 16
Sep,2025
16
Sep,2025
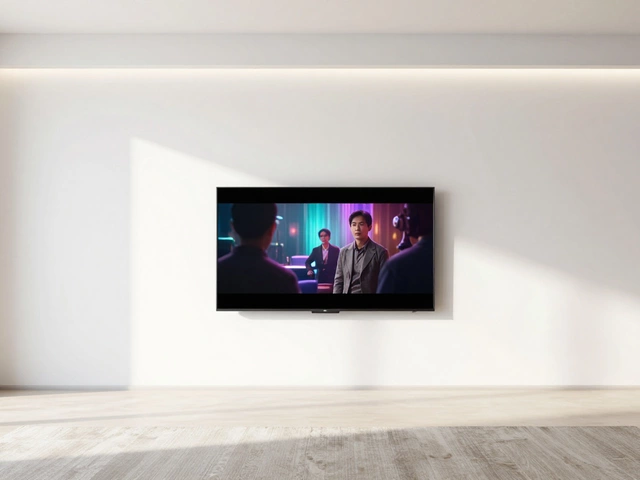
Wall-mounting a TV looks sleek, saves floor space, and makes your lounge feel bigger. But it’s not a free upgrade. Get the height wrong and you’ll feel it in your neck. Botch the cabling and you’re breaching Aussie wiring rules. Use the wrong anchors and you’re risking a TV on the floor. Here’s the blunt truth about the disadvantages of wall mounting TV, plus how to decide if it actually suits your room and lifestyle.
- Ergonomics often take a hit: mounted too high = neck strain and worse picture quality.
- Cabling isn’t trivial in Australia: in-wall power needs a licensed electrician (AS/NZS 3000).
- Walls matter: plasterboard, brick veneer, concrete all need different fixings and planning.
- Access and flexibility drop: upgrades, new consoles, or moving furniture become harder.
- Real costs add up: mount + install + power + patch/paint often beats the price of a good TV stand.
Why wall‑mounting can backfire: real‑world drawbacks
Ergonomics: the biggest miss. The most common mistake is mounting too high. When you’re relaxing on the couch, your eyes should line up with the middle of the screen. Mounting above eye level forces your neck to angle up, and tilting the TV down only partly fixes it. You also lose contrast and colour accuracy when you’re off-axis, especially on many LCD panels.
“Keep the vertical viewing angle to the top of the screen within 15°, and place the screen’s centre at eye level.” - THX Display Specifications
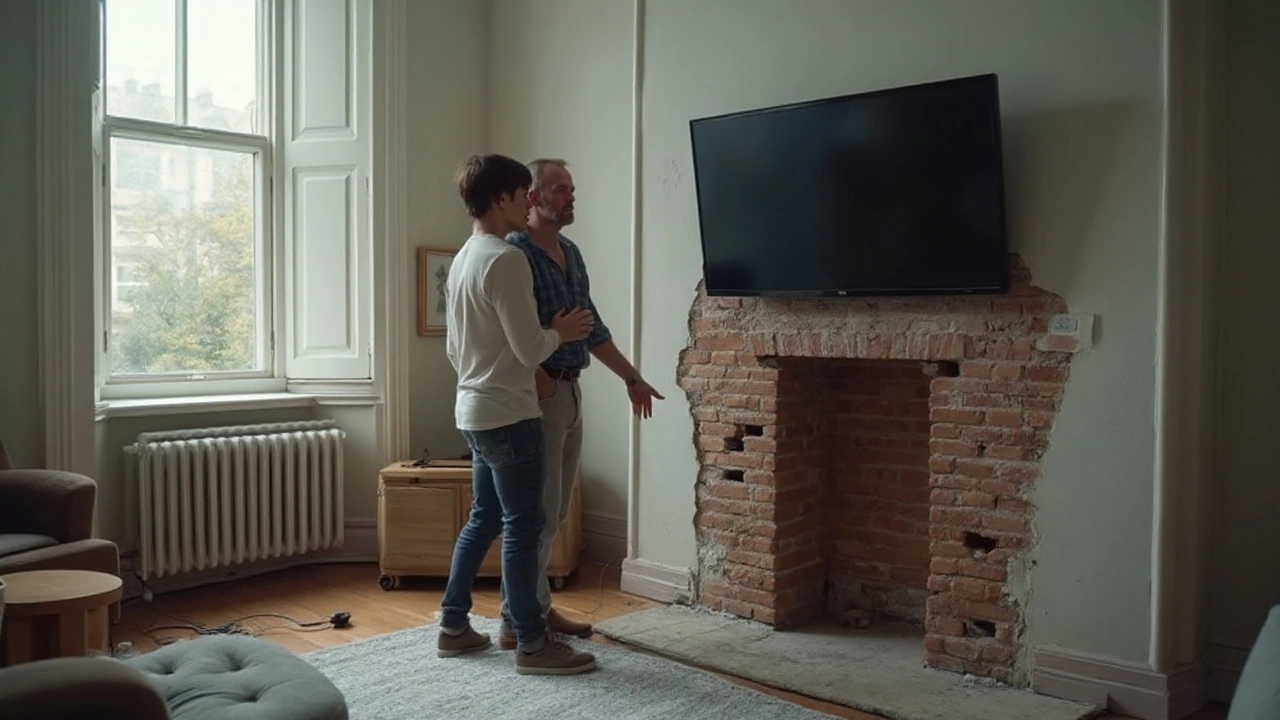
In a typical Melbourne lounge, the seated eye height is around 100-110 cm from the floor. On a 65-inch TV, the screen centre often ends up near 90-95 cm if it’s on a lowline cabinet. On a wall, people push it up so it “looks right,” and the centre creeps to 115-140 cm. That gap is what your neck complains about. Mounting over a fireplace? That’s usually a guaranteed craned neck and washed-out image unless you use a drop-down arm that brings the TV to eye height when in use.
Glare and reflections get worse. Fixed mounts lock your screen in one plane, so if your windows sit opposite or at 90° to the TV, you’ll fight reflections every sunny afternoon. Full-motion arms help, but they add weight, cost, and torque on the wall. Glossy screens on many OLEDs and mid-range LCDs amplify this, especially in bright Aussie living rooms.
Sound suffers more than you think. TVs already have compromised speakers. On a wall, bass can boom (wall coupling) while voices get boxy. Put a soundbar under a high-mounted TV and it sits too high above your ear line; stick it on a mantle and it may reflect off the surface. If the bar mounts to the TV, its position changes when you swivel the arm, which can help-but it adds weight to the mount, and the whole assembly needs stronger anchoring.
Australian cabling rules bite. You can’t legally run a standard power cord inside the wall here. AS/NZS 3000 (the Wiring Rules) requires in-wall mains cabling to be fixed, rated, and installed by a licensed electrician. Same deal if you want a new GPO (power point) behind the TV. HDMI and low-voltage cables can go in-wall if they’re in conduit and separated from mains per the separation rules, but again, plan it or go surface-mount conduit. DIY “hide the power cord in the cavity” is not compliant.
Installation risk is real. Plasterboard alone won’t hold a big TV on a cantilever arm. You need to fix into timber studs or masonry with the right anchors. Typical Aussie stud spacing is 450 mm or 600 mm (AS 1684). Miss a stud, or use cheap toggles, and the mount can loosen over time. Brick veneer? The outer brick can be crumbly and needs proper masonry anchors; over-tightening can blow out the face.
Remember torque: a 22 kg TV on a full-motion arm extended 500 mm puts a bending moment on the wall like hanging a heavy toddler off a lever. The mount might be rated to 45 kg, but the wall may not be. Ratings assume perfect anchoring.
Access and upgrades are harder. Swapping a streaming stick or plugging in a visiting console becomes an elbow-in-the-cavity job. Side-facing ports help, but you’ll still be fishing behind the panel. If you rearrange the room, those holes stay put. New sound system? You may have to re-run hidden cables, punch more holes, or live with exposed trunking.
Damage and moving headaches. Mounting leaves holes-often big ones-plus paint touch-ups. In rentals, you’ll usually need written approval and must make good at the end of the lease. Patching multiple 10-12 mm lag screw holes and repainting a feature wall isn’t cheap or quick.
Heat and soot near fireplaces. Above-mantle installs look tidy but run hot. Many TVs specify maximum ambient and surface temperatures. If the wall over your fireplace exceeds 40°C during use, you’re outside spec-bad for OLED panels and adhesives. A cheap IR thermometer will tell you; if it’s hot to your hand, reconsider.
Safety is a two-sided coin. Done right, a wall mount can be safer for kids than a freestanding TV. Done wrong, it’s a falling hazard. The failure points aren’t the metal arms; it’s the fixings into the wall and the unknowns you didn’t scan-pipes, hidden wiring, or weak substrates.
Do you actually need a wall mount? Measure, test, decide
Before you buy anything, do this quick, low-tech check. It’s faster than a return and safer than guessing.
- Measure your seated eye height. Sit on your couch, hold a tape measure from floor to your eyes. Note the number (usually ~100-110 cm).
- Mark screen centre. On the wall, put a bit of painter’s tape at your eye height. Your TV’s centre should sit within ±5 cm of this mark.
- Do the cardboard test. Cut cardboard to your TV’s size (or use tape to outline). Stick it where you plan to mount. Sit down at your usual seats. Any neck tilt? Any window glare?
- Open a bright scene on your current TV or phone at that spot. Check reflections at your typical viewing times (late afternoon sun in Melbourne can be brutal).
- Check studs. Run a decent stud finder across the wall. Confirm two studs within the mount’s width (450 or 600 mm spacing). If it’s masonry, note the brick condition and mortar depth.
- Plan power legally. Is there a GPO nearby? If not, budget an electrician for a power point behind the TV or accept visible surface conduit.
Use these simple rules of thumb to weigh your decision:
- Eye-level rule: screen centre at eye height for primary seats. If you must go higher, tilt down, but keep the vertical angle to the top of screen under ~15°.
- Distance rule: ideal viewing distance is roughly 1.2-1.6× the diagonal for 4K. For a 65-inch (165 cm), aim for 2.0-2.6 m. If you sit closer, minor height errors feel bigger.
- Stud rule: no studs, no heavy cantilever. Go fixed/tilt or mount to a backing board anchored across multiple studs.
- Torque rule: a 20-30 kg TV at 0.5 m extension equals roughly 10-15 N·m of moment at the wall per screw group. Older plaster or crumbly brick? Reduce extension or pick another solution.
- Glare rule: if you can see a window reflection in your cardboard mock-up at your usual viewing time, you’ll need a full-motion mount, better blinds, or a different wall.
Australian-specific constraints to factor in:
- Electrical: AS/NZS 3000 requires a licensed electrician for in-wall mains and new power points. Don’t run flexible cords in cavities.
- Separation: Keep low-voltage (HDMI, antenna, Ethernet) separated from mains per the Wiring Rules; conduit makes this simpler and safer.
- Tenancies: In Victoria, alterations that cause damage (like big mount holes) usually need landlord consent. Expect to patch and repaint at end of lease.
- Walls: Timber stud (gyprock) is common in newer units; 450/600 mm spacing is typical. Brick veneer is common in houses; you’ll anchor into brick, not the thin render.
If two or more of these are true-rental, no studs where you need them, fireplace mount, strong afternoon glare, no nearby power-then a wall mount is likely to create more pain than joy.

Alternatives and mitigations that solve the same goals
If you want the clean look without the headaches, you’ve got options.
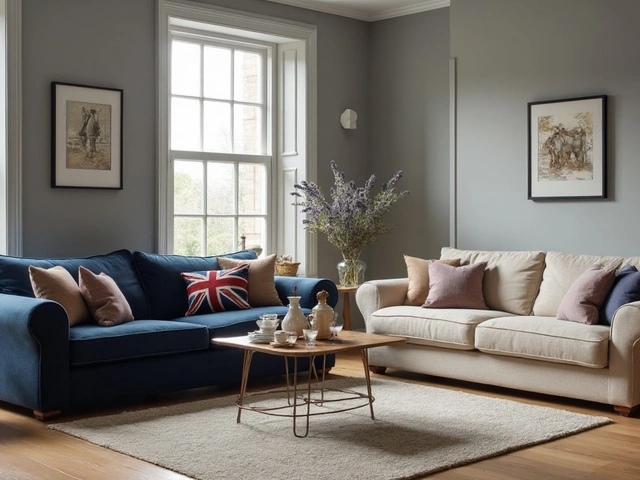
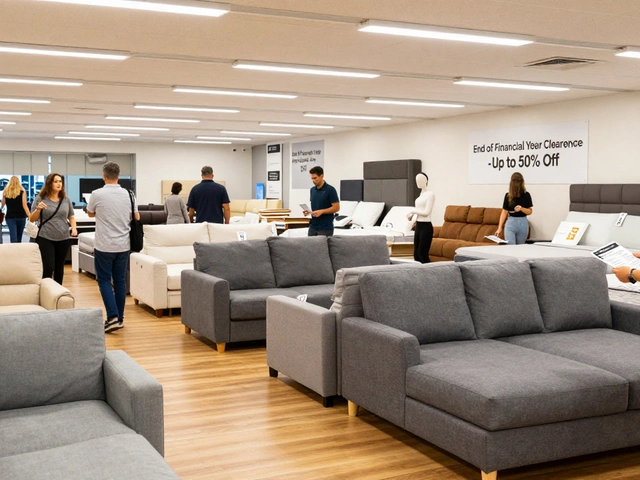
Lowline TV stand or media console. A solid cabinet fixes three problems at once: correct eye height, hidden cables, easy device access. Use anti-tip straps for child safety (attach to studs). Many stands swallow a soundbar and sub, keeping the front stage tidy.
Floor-to-ceiling pole mounts or freestanding “no-drill” frames. These clamp between floor and ceiling or stand on a weighted base, giving a floating look with cable management. Great for rentals and for rooms with concrete walls where drilling is a pain.
Rail or backing board. Mount a painted plywood board across two or three studs, then attach the TV mount to the board. Spreads the load, lets you place the TV off-stud positions, and makes future swaps easier. You’ll still patch two big screw groups someday, not a dozen scattered holes.
Drop-down over-fireplace mounts (mantel mounts). If you must go above a mantle, these bring the TV down to eye height during use. They require strong studs or masonry and cost more, but they protect your neck and picture quality.
If you’re set on wall mounting, mitigate the pain:
- Pick a full-motion mount only if you need it. Fixed/tilt mounts are lighter, cheaper, and less risky for weak walls.
- Use surface conduit for power and low-voltage if you can’t get an electrician soon. Paintable trunking looks neat and stays compliant.
- Attach the soundbar to the TV with a mounting kit so audio follows the screen if you swivel.
- Add 6500K bias lighting behind the TV to reduce perceived glare and make a higher mount more tolerable at night.
- Pre-wire spare HDMI and Ethernet. Pull cords save you from opening the wall again.
| Risk area | Why it’s a disadvantage | Who’s most affected | Typical fix or mitigation (AU$, 2025) |
|---|---|---|---|
| Too-high mounting | Neck strain, reduced image quality | Sofas with low seats, taller viewers | Tilt mount ($70-$180) or drop-down arm ($400-$900) |
| Glare/reflections | Fixed angle locks in reflections | Rooms with west-facing windows | Full-motion arm ($180-$450) + blinds ($200-$600) |
| Power in the wall | Illegal to run flex cords in cavity | Homeowners and renters alike | Electrician for GPO ($150-$300); surface conduit ($30-$90) |
| Weak fixings | Plasterboard anchors pull out | Gyprock walls without studs | Mount to studs/backing board ($50-$150 materials, $150-$300 labour) |
| Brick veneer issues | Crumbly bricks, shallow mortar | Older houses | Quality masonry anchors ($30-$80) + installer ($180-$350) |
| Device access | Hard to swap HDMI/USB | Gamers, tinkerers | Side-facing TV, right-angled HDMI ($20-$40), extra patch panel ($60-$120) |
| Sound quality | Wall coupling, bad bar placement | Open-plan rooms | TV-attached bar bracket ($30-$90), room EQ, rugs/soft furnishings |
| Fireplace heat | Overheats panel and adhesives | Houses with active fireplaces | Drop-down mount ($400-$900), mantel shield ($80-$200), or move location |
| Make-good on move-out | Patching and repainting | Renters | Patch/paint ($150-$400 DIY or $300-$800 pro) |
| Total project cost creep | Hidden labour and materials | Anyone upgrading | Mount ($60-$450) + install ($180-$350) + power/cabling ($150-$600) + repairs ($150-$600) |
Checklists, FAQs, and next steps
Here’s a quick pre-drill checklist to avoid nasty surprises:
- Confirm screen centre can sit within 5 cm of your eye height.
- Test glare at your usual viewing times with a bright screen.
- Locate at least two studs (450/600 mm spacing) or assess masonry quality.
- Verify VESA pattern and mount compatibility with your TV size/weight.
- Plan power legally: existing GPO or book an electrician.
- Plan cable paths: surface conduit or in-wall with conduit and separation.
- Check you can reach ports or pre-run extra HDMI/Ethernet.
- Weigh the torque: full-motion only if you need swivel/tilt.
- Measure soundbar clearance and mounting method.
- Budget make-good (patch/paint) if you’re renting or might move soon.
Mini‑FAQ:
- Is it safe to mount a TV on plasterboard? - Yes, if you anchor into studs with the correct lag screws or use a backing board. Don’t rely on plasterboard anchors for heavy TVs or cantilever arms.
- Can I mount into one stud with heavy-duty toggles? - Not recommended for full-motion arms. Use two studs minimum or a board spanning multiple studs.
- How high over a fireplace is acceptable? - Only if a drop-down mount brings the screen to near eye height during viewing, and wall temperature stays under the TV’s spec (often around 40°C). Test with an IR thermometer.
- Do OLEDs need special care? - They’re lighter than older plasmas but more sensitive to heat. Keep within the manufacturer’s temp guidelines and avoid over-fireplace installs without a drop-down mechanism.
- Can I legally hide cables in the wall in Australia? - Low-voltage (HDMI/antenna) can go in conduit with proper separation. Mains power requires a licensed electrician per AS/NZS 3000. Don’t run flexible cords in cavities.
- Will a mount void my TV warranty? - Mounting itself doesn’t, but damage from incorrect installation or heat exposure will. Follow the VESA and weight specs.
- I rent. Any chance I can wall mount? - Ask for written permission and expect to patch/paint later. Freestanding frames or pole systems are safer bets for bonds.
Next steps by scenario:
- Homeowner with studs and no glare: You’re a good candidate. Book an electrician for a GPO, pick a tilt mount if you need slight angle, and keep screen centre at eye height.
- Rental apartment with gyprock and afternoon glare: Skip drilling. Use a lowline cabinet with anti-tip straps and blackout blinds. Consider a freestanding frame if you want a floating look.
- Brick veneer lounge, mantle temptation: Measure heat first. If it’s warm, use a drop-down mantel mount or shift the TV off the fireplace wall.
- Gamer with frequent device swaps: Stand wins. Easy access to ports and storage for controllers, VR gear, and a charging dock.
- Open-plan space with off-axis seating: If you must wall mount, get a quality full-motion arm and keep extension minimal. Attach the soundbar to the TV so audio follows.
Troubleshooting common regrets:
- Mounted too high: If you used a fixed mount, swap to a tilt or drop-down. If you’re already on a full-motion arm, increase tilt and add bias lighting; consider lowering to hit eye-height.
- Wobbly or creaking mount: Check each fixing into studs or masonry. Replace questionable anchors. If the wall is weak, move to a board spanning multiple studs.
- Visible cords ruining the look: Install paintable surface conduit now, and plan a licensed GPO behind the TV later.
- Glare you didn’t predict: Shift blinds/curtains, rotate the TV with a full-motion arm, or change to a stand allowing a better angle.
- New console won’t reach: Use longer certified HDMI 2.1 cables with right-angle adapters, or add a small patch panel behind the TV so swaps happen at the cabinet end.
- Wall damage on removal: Use proper plaster repair (backing patch for large holes), sand, prime, and colour-match paint. Budget a weekend or hire a painter.
If the clean look is your aim, a good TV stand or freestanding mount often gets you 90% of the aesthetic with fewer compromises. If you still want the TV on the wall, treat it like a mini-renovation: measure, plan power legally, pick the right mount for your wall, and keep your screen where your eyes naturally rest. That’s how you get the style without the regret.